


Managing Your Tableau Data Sources
To leverage the power of Tableau, we encourage users to take inventory of where their data is coming from (cloud-based tools, local spreadsheets), in what form (CSV, Excel, JSON, etc.), and how unit developers will be creating reports. Doing so will make setting up a workflow for managing data sources easier, sustainable, and scalable.
There are three scenarios that most developers will fall into when they begin to develop Tableau reports.
Local Data Sources
Typically involves spreadsheets on the user's desktop or unit's shared drive.
If you're using local data sources, we can provision a Tableau File Repository Share for your department that is accessible to Tableau Server.
Direct Connections
Ability to connect directly to data in the cloud or a local database from Tableau Desktop.
Departments using direct connections will need to work with us to open the firewall for such connections
Enterprise Data Sources
Connect to existing published data sources centrally managed by GT.
You can simply connect to the data sources on Tableau Server. Appropriate data stewardship approvals are required.
Using Local Data Sources - Tableau File Repository
Why do I need a Tableau File Repository Share for my local data sources?
A Tableau File Repository is a resource that has been specifically configured to work with Tableau Server. One of the main benefits over other network file sharing solutions (OneDrive, DropBox, etc.) is the ability to schedule automatic refresh for your data source.
This allows you to update the data in a spreadsheet or text file and have it reflected on your Tableau visualizations without having to update and republish your workbooks each time the data is updated.
Connecting to your Tableau File Repository Share
Step 1: Connect to the VPN
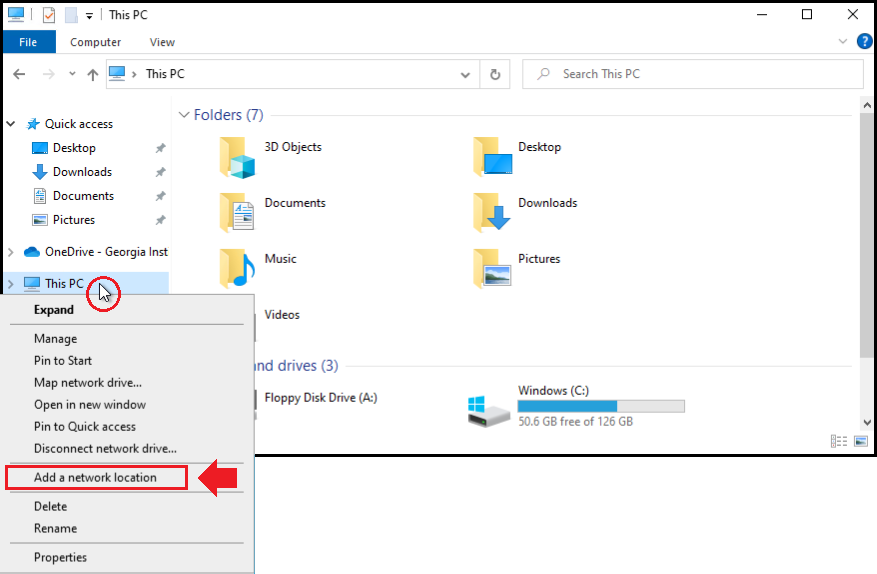
Step 2: Right-click on "This PC" in the Windows Explorer and select "Add a network location"
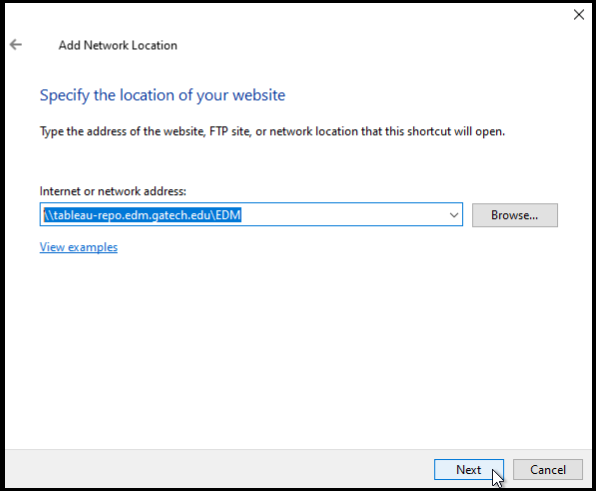
Step 3: Follow the prompts to choose a custom network location and enter the path to your department's Tableau File Repository Share and complete the remaining prompts
\\tableau-repo.edm.gatech.edu\DEPT
Step 4: Once you've followed the steps above, you can navigate to your Tableau File Repository Share by clicking "This PC" and selecting your share under Network locations.
REMEMBER! You must be connected to the VPN to connect to your Tableau File Repository Share.

Organizing your Tableau File Repository Share
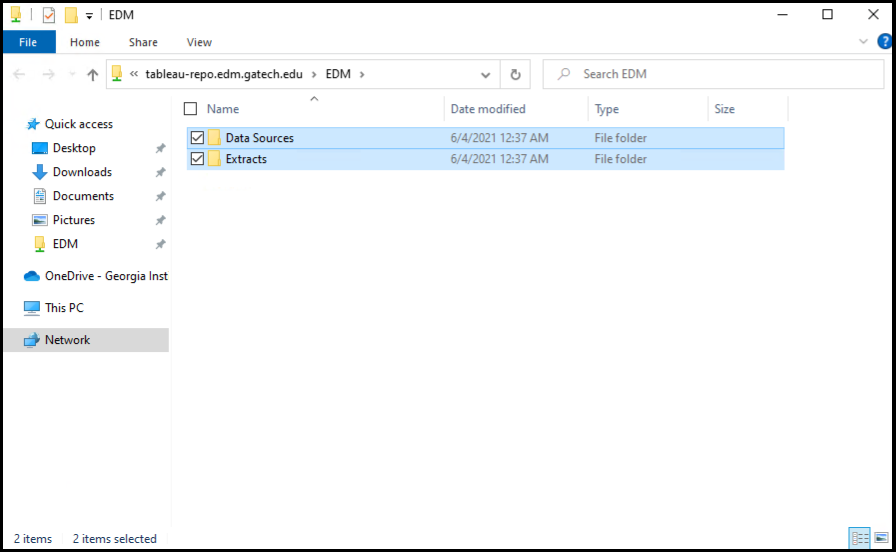
Step 5: We highly recommend creating separate folders in your Tableau File Repository Share. One for your "Data Sources" and a separate folder for "Extracts" that will be generated from Tableau.
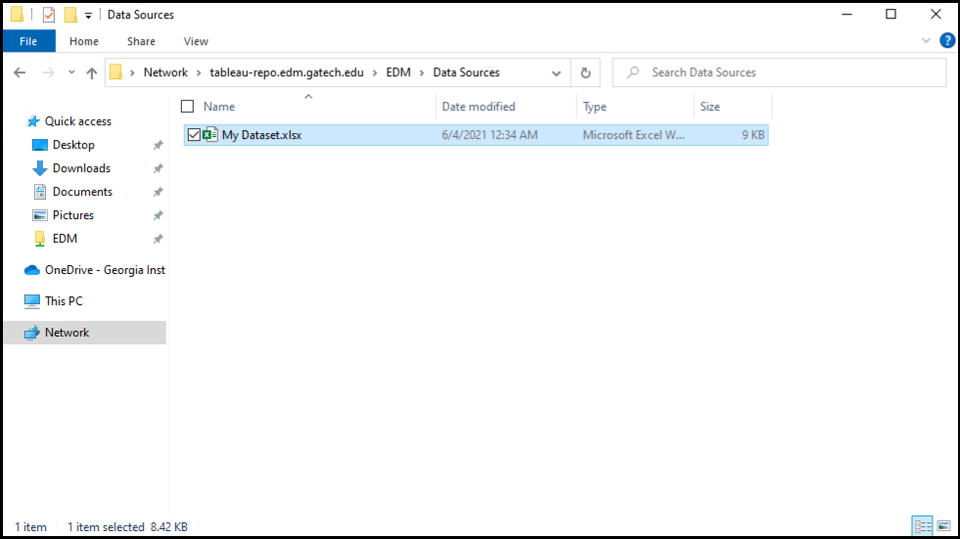
The "Data Sources" folder is where you will place your files that contain the data. In this example, we'll be using a Microsoft Excel file.
TIP: When leveraging Excel for importing data into Tableau, it is important to follow certain best practices for structuring and organizing your data. Please review the following Tableau article with tips for working with your data: https://help.tableau.com/current/pro/desktop/en-us/data_tips.htm
Configuring your Tableau Data Source
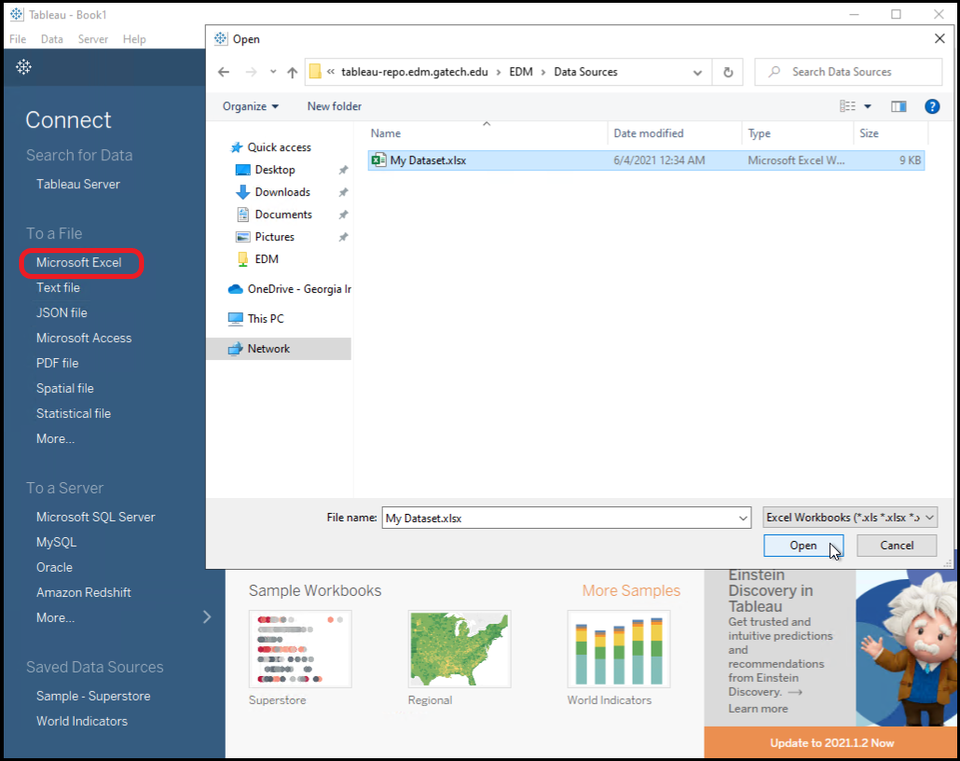
Step 6: Open Tableau Desktop and click "Microsoft Excel" in the left-hand menu. Then navigate to the data source in your Tableau File Repository Share and click Open.
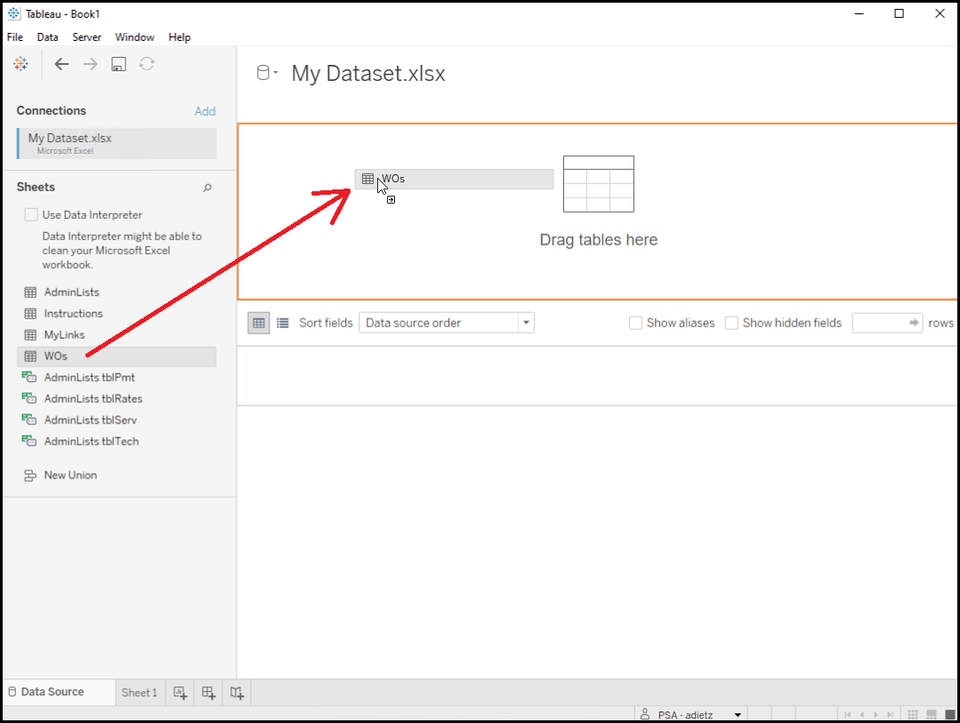
Step 7: If your Excel spreadsheet has multiple worksheets (tabs), click and drag the worksheet that contains the data you want to import into the field that reads "Drag tables here".
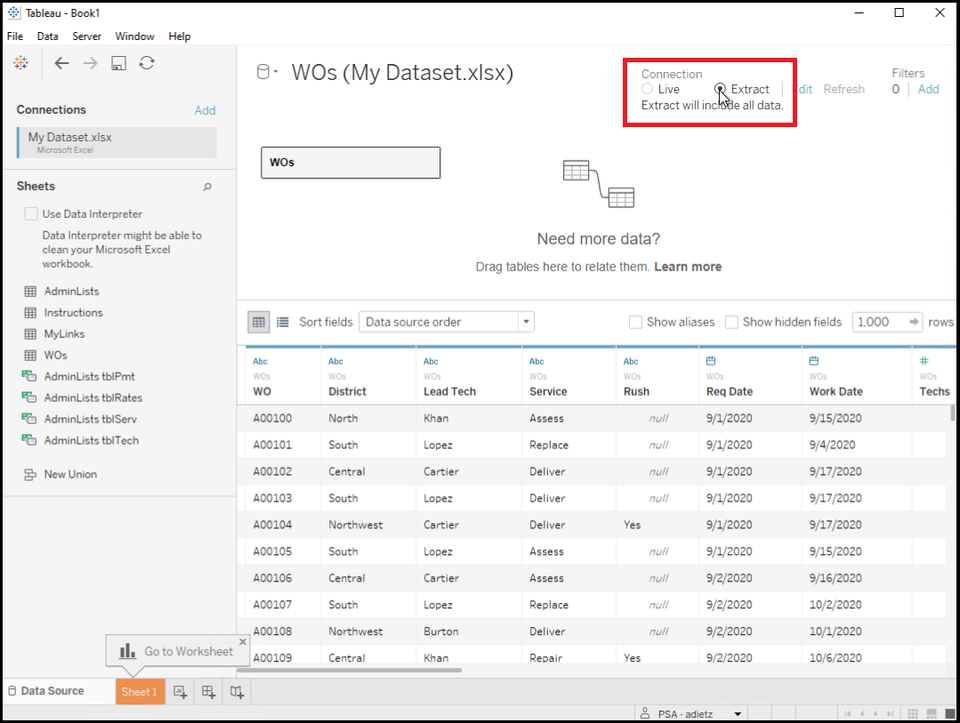
Step 8: Select "Extract" under "Connection" in the upper right-hand corner.
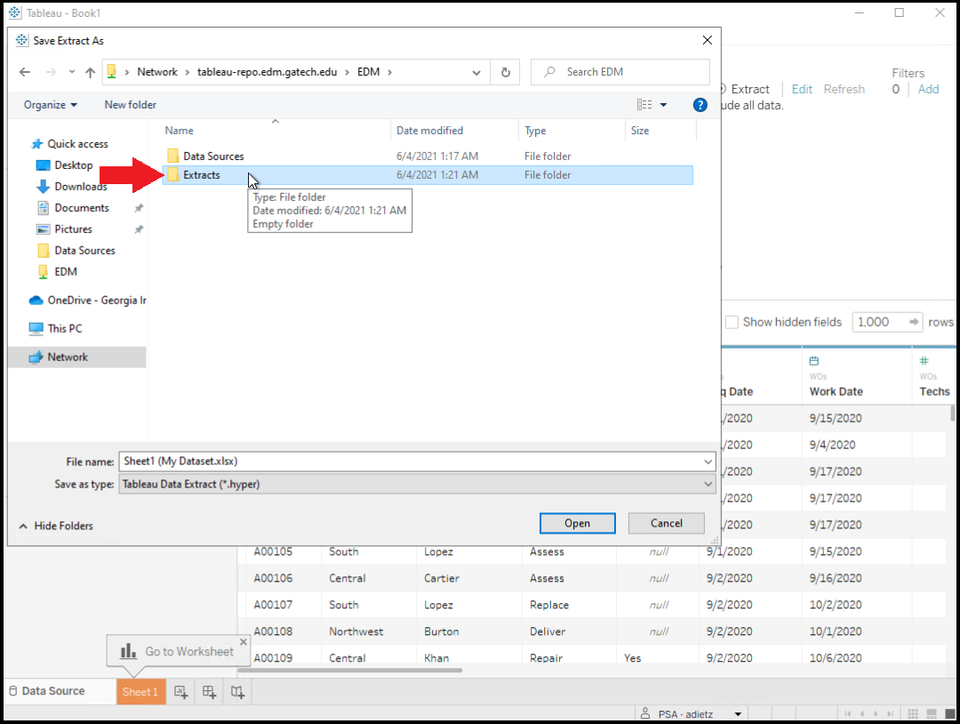
Step 9: You will be prompted for a location where the data extract is to be created. Navigate to your Tableau File Repository Share's "Extracts" folder and click "Open".
Publishing your Data Source to Tableau Server
Step 10: Click on the tab "Sheet 1" highlighted in orange next to the Data Source tab.

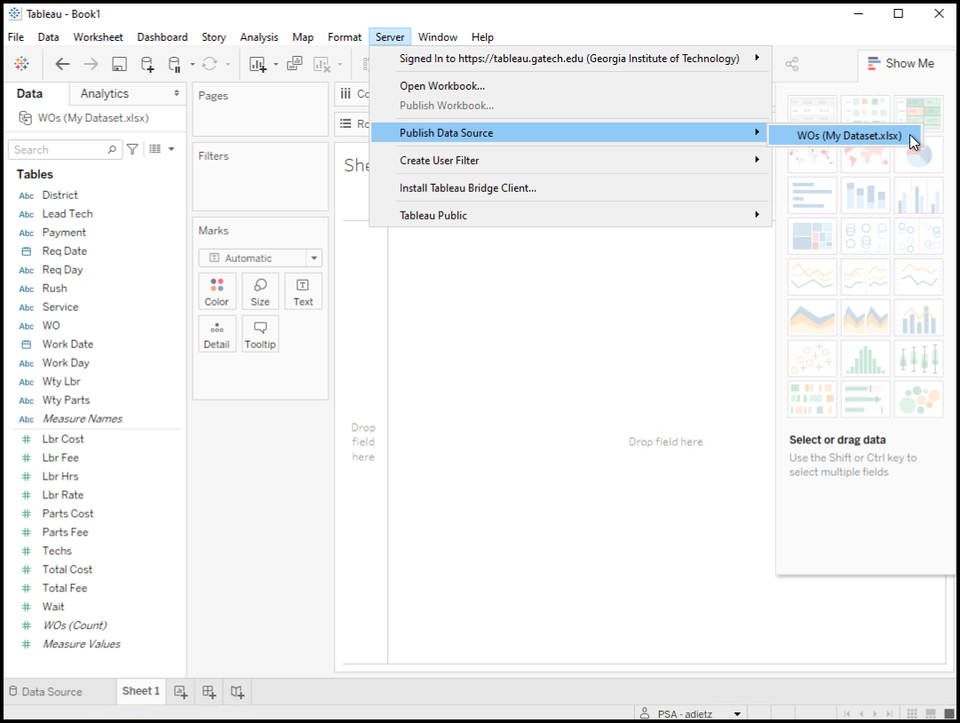
Step 11: With the worksheet open, click on "Server" in the top menu, select "Publish Data Source", and click on the data source name.
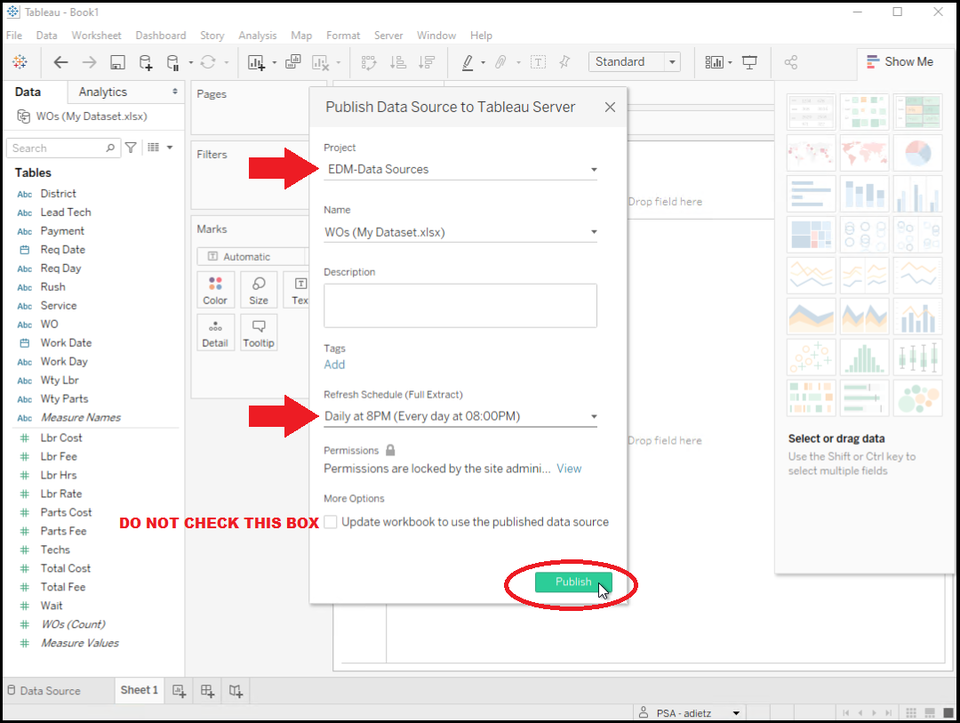
Step 12: Select the "Dept-Data Sources" folder within your department's project space, add a description if desired, select a refresh schedule, and click "Publish".
Your Tableau data source is now published to Tableau Server and ready to be used in your visualizations!
If you update the data source in your Tableau File Repository Share, all workbooks using this published data source will now automatically updates in accordance with the refresh schedule you set in Step 12 above.